The Ultimate Guide to Nail Art: Techniques, Trends, Tools, and At-Home Mastery
Nail art has evolved from a simple beauty routine into a dynamic form of self-expression, fine art, and global culture. Whether you prefer minimalist accents, bold chromatic finishes, intricate hand-painted imagery, or structural gel extensions, your nails serve as ten tiny canvases waiting for creativity.
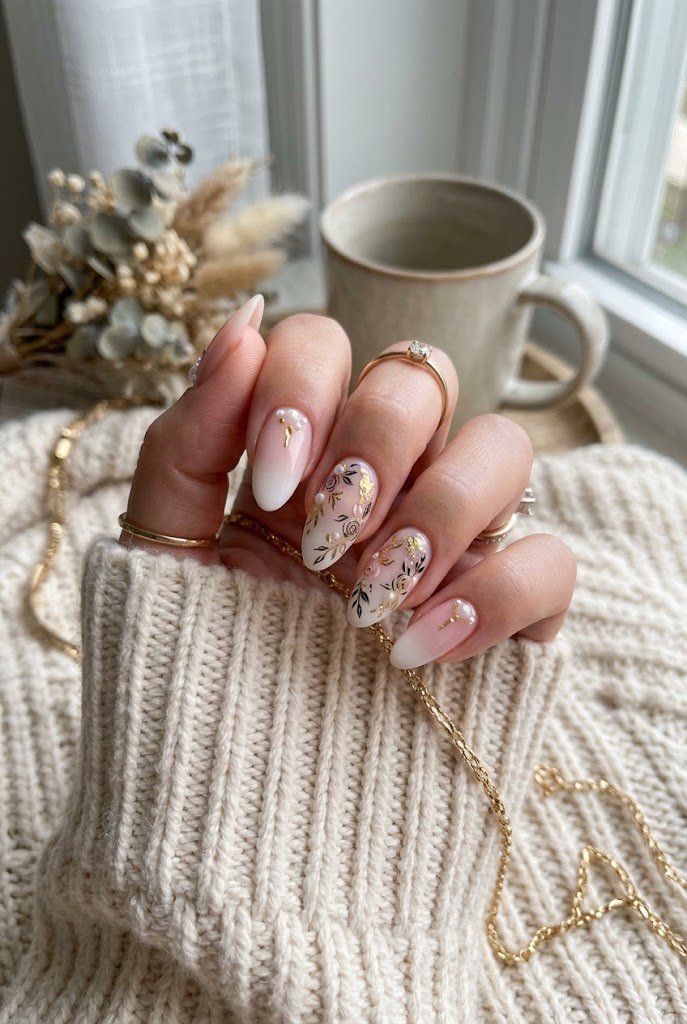
This comprehensive guide covers everything you need to know about nail art—from essential anatomy and preparation to advanced techniques, tool breakdowns, step-by-step tutorials, and long-term nail health strategies.
Part 1: Nail Anatomy and Preparation
The foundation of any stunning nail art design is healthy, well-prepared natural nails. Canvas preparation dictates how long your polish or gel lasts and prevents lifting, chipping, and damage.
Understanding Your Nails
- Nail Plate: The hard, visible surface made of translucent keratin protein layers.
- Nail Bed: The skin underneath the nail plate that supplies nutrients and oxygen.
- Eponychium & Cuticle: The eponychium is the living tissue at the base of the nail. The cuticle is the dead, dry skin shed onto the nail plate. Only dead cuticle tissue should be gently trimmed or pushed back.
- Free Edge: The tip of the nail that extends past the finger.
- Matrix: The root under the skin where new nail cells are generated. Protecting this area ensures long-term healthy growth.
The Step-by-Step Prep Routine
- Sanitize: Wash your hands thoroughly and disinfect your tools with 70% isopropyl alcohol.
- Shape: File your nails in a single direction (avoiding a back-and-forth sawing motion) using a 180/240 grit wooden or glass file.
- Cuticle Care: Apply a liquid cuticle remover, wait 60 seconds, and gently push back the dead tissue using a cuticle pusher. Micro-trim only translucent hangnails.
- Dehydrate & Buff: Lightly buff the shiny surface with a high-grit buffer (240+ grit) to remove surface oils. Wipe the nail plate clean with pure acetone or a 90% alcohol wipe.
- Base Coat Application: Always apply a dedicated base coat—whether standard air-dry or UV/LED gel—to protect against staining and ensure maximum adhesion.
Part 2: Nail Shapes and Structural Foundations
Choosing the right shape enhances hand symmetry and provides the right aesthetic proportions for specific design styles.
| Nail Shape | Best For | Features & Characteristics |
| Round | Short, low-maintenance nails | Mirrors the curve of the fingertip; highly durable and resistant to breakage. |
| Square | Wide nail beds, classic styles | Sharp 90-degree corners with a flat top edge; bold look, best for strong natural nails. |
| Squoval | Universal compatibility | Combines square structure with softened, rounded corners; versatile and durable. |
| Oval | Medium to long lengths | Tapers gently toward a smooth, rounded peak; creates an elongating effect on fingers. |
| Almond | Long nails, medium extensions | Tapered sides ending in a soft point; elegant and popular for modern gel art. |
| Coffin / Ballerina | Acrylic and hard gel extensions | Long, tapered sides ending in a squared-off tip; ideal for broad art canvas space. |
| Stiletto | Extreme lengths, bold statement art | Extremely sharp point; dramatic and eye-catching, best preserved with structural gel/acrylic. |
Part 3: Essential Tools and Product Breakdown
Building an effective nail art toolkit does not require buying an entire supply store, but knowing which tools perform specific tasks saves time and effort.
Everyday Basics
- Nail Files & Buffers: Glass files for natural nails; 100/180 grit files for extensions; 240/320 grit buffers for smooth surfaces.
- Precision Cleanup Brushes: Angled flat synthetic brushes dipped in acetone or cleanser to crisp up edges around cuticles.
- Lint-Free Wipes: Essential for removing tackiness and cleaning brushes without leaving behind fibers.
Decorative Art Tools
- Dotting Tools: Dual-ended metal spheres of varying diameters. Used for polka dots, flowers, eyes, leopard prints, and swirling.
- Fine Detail Liner Brushes: Brushes with ultra-thin synthetic hair ranging from 5mm (detail work) to 12mm+ (long line drawing).
- Ombré Sponges: High-density makeup or latex sponges used for smooth color gradients and airbrush-style fades.
- Stamping Plates & Stampers: Etched metal plates combined with silicone stampers to transfer complex line art and patterns in seconds.
- Silicon Applicators: Soft tools ideal for pressing down foils, chrome powders, decals, and stickers without scratching.
Part 4: Core Nail Art Techniques (Beginner to Advanced)
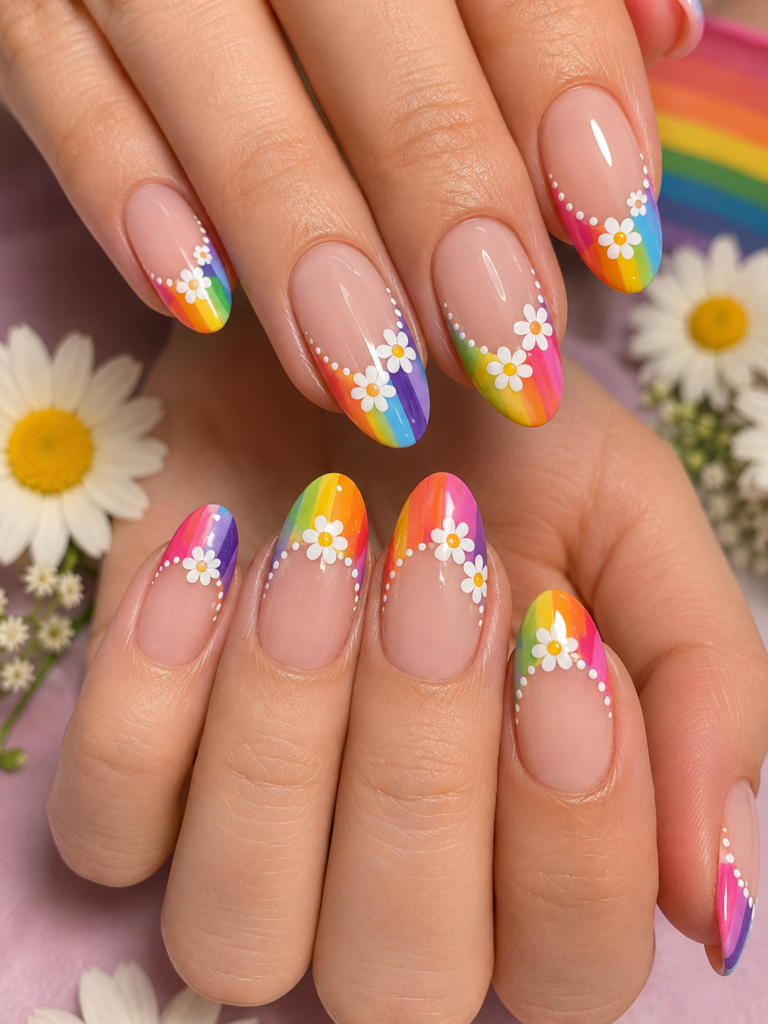
Technique 1: Precision Dotting & Floral Clusters
- Difficulty: Beginner
- Required Tools: Dotting tools of two sizes, two contrasting polish colors.
- Steps:
- Apply your base color and allow it to dry completely.
- Dispense a drop of art polish onto a non-porous palette (like foil or glass).
- Dip the larger dotting tool into the polish and place five dots in a circle to form flower petals.
- Dip the smaller dotting tool into a contrasting color and place a single dot in the center.
- Seal with a top coat after the polish sets.
Technique 2: Gradient & Ombré Nails
- Difficulty: Intermediate
- Required Tools: Latex barrier or liquid tape, wedge sponge, two or three polish shades.
- Steps:
- Apply a light base coat shade across the full nail and let dry.
- Protect the surrounding skin with liquid latex.
- Paint horizontal bands of your chosen colors directly onto a high-density sponge.
- Dab the sponge repeatedly over the nail with light pressure to blend the boundaries between colors.
- Repeat with a fresh layer of polish on the sponge for deep saturation.
- Peel away liquid latex and seal with a plumping top coat to smooth out texture.
Technique 3: Chrome powders & Liquid Mirror Finishes
- Difficulty: Intermediate (Best with UV/LED Gel)
- Required Tools: Black gel polish, No-Wipe Gel Top Coat, Chrome Powder, Eyeshadow applicator.
- Steps:
- Apply a base layer of dark gel polish (black provides the richest mirror sheen) and cure in your lamp.
- Apply a dedicated no-wipe top coat and cure for roughly 30–45 seconds (slightly under-cured surfaces hold chrome best).
- Rub a small amount of chrome powder onto the nail using an eyeshadow applicator until the mirror effect appears.
- Dust off excess loose powder with a soft fan brush.
- Seal the free edge and full nail plate with a hard gel or standard top coat to prevent chipping.
Technique 4: Blooming Gel & Water Marble Designs
- Difficulty: Advanced
- Required Tools: Blooming gel (for gel systems) OR a cup of room-temperature distilled water (for lacquer).
- Blooming Gel Method:
- Apply a coat of uncured blooming gel over your cured base color.
- Drop colored polish onto the wet blooming gel using a liner brush or dotting tool.
- Watch the wet polish fan outward organically, creating watercolor, snake-skin, or marble blooms.
- Cure immediately under an LED lamp once the desired spread is achieved.
Part 5: Popular Style Themes and Trending Aesthetics
1. Modern French Reimagined
The traditional white-and-pink French manicure has expanded into vibrant variations:
- Micro-French: An ultra-thin line framing just the immediate edge of short or oval nails.
- Chrome Tip French: Neutral base paired with metallic chrome tips in silver, gold, or rose tones.
- Double French: Two parallel thin lines outlining the free edge instead of one solid block.
2. Negative Space & Minimalist Geometry
Using the natural nail bed color as part of the artwork creates clean, architectural designs:
- Diagonal cut-outs, half-moon accents at the lunula base, and abstract wavy lines over sheer nude bases.
3. Y2K & Maximalist Textured Art
Inspired by early 2000s street style and Japanese 3D nail art:
- Raised gel drips, rhinestone clusters, metallic chains, jelly translucent colors, and airbrushed aura centers.
Part 6: Long-Term Nail Health and Art Aftercare
Creating beautiful nail art means very little if the underlying nail becomes damaged, thin, or brittle. Maintaining canvas health ensures long-lasting wear and comfort.
- Hydrate Cuticles Daily: Apply pure jojoba or vitamin E cuticle oil at least twice daily. Jojoba oil penetrates the keratin layers of the nail plate, maintaining flexibility and preventing brittleness.
- Never Scrape or Peel Off Products: Peeling gel or acrylic pulls away top layers of natural keratin, leaving nails thin and sensitive. Always use proper removal processes (soaking in acetone after breaking the top seal coat).
- Wear Gloves During Chores: Household cleaning chemicals and prolonged hot water exposure cause the natural nail plate to swell and contract, popping off gel polishes and acrylic layers prematurely.
- Take Product Breaks: If you wear heavy extensions, schedule periodic “recovery phases” where you focus entirely on conditioning, trimming, and strengthening with keratin treatments.
Quick Reference Checklist for Long-Lasting Nail Art
- Cleanse and Dehydrate: Ensure 100% oil-free nail plates before base coat application.
- Capping the Free Edge: Run your polish brush along the front edge of the tip to lock layers together.
- Thin Layers Over Thick: Paint multiple thin coats rather than one heavy layer to prevent bubbles and uneven curing.
- Quality Top Coat: Invest in a durable, high-shine or velvety matte top coat, refreshing it every 3–4 days to extend design life.